Follow these instructions if you are in the following situation:
- You have a Zigbee2MQTT network running,
- you no longer have the original adapter,
- and you want to migrate to Home Assistant Connect ZBT-1.
Please note that not all settings can be migrated:
- These steps help migrate the network, meaning you won't have to pair all your devices again with Home Assistant Connect ZBT-1.
- However, some higher-level settings cannot be migrated.
- Elements such as device names will be lost.
- There is currently no migration path to transfer all settings.
To migrate a Zigbee network from a Zigbee2MQTT backup
Step 1
Creating a Zigbee2MQTT backup
- Under Settings > Apps, open the Zigbee2MQTT app and select Open Web UI.
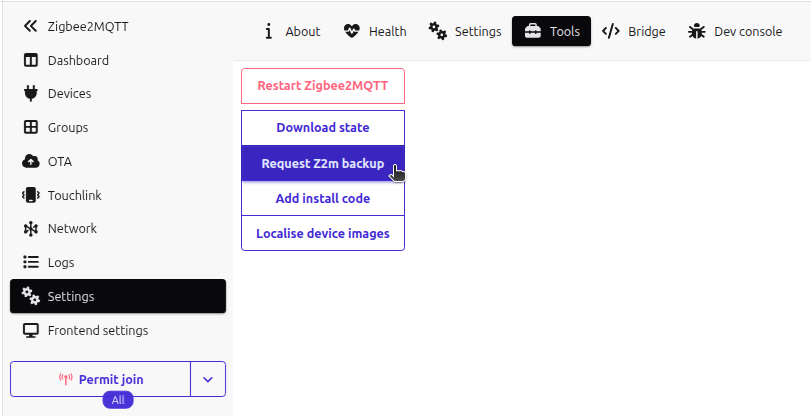
- In the Zigbee2MQTT UI, go to Settings > Tools and select Request Z2M backup.
- Select Download Zigbee2MQTT backup.
-
Result:A zip file should now be downloaded into your Downloads folder.
Step 2
Unzipping the backup folder

- In your Downloads folder, unzip the z2m-backup file.
- Info: It should contain a coordinator_backup.json file.
Step 3
Stopping the Zigbee2MQTT app
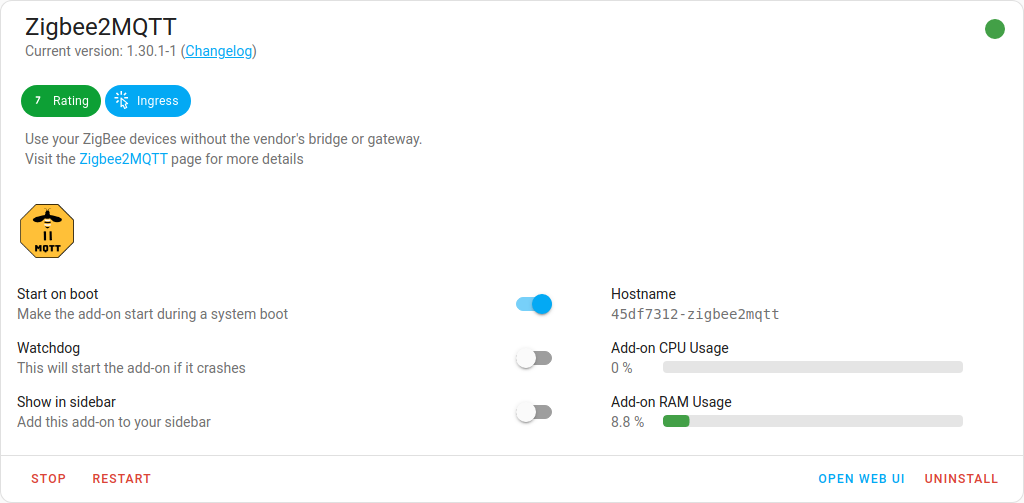
- Under Settings > Apps, in the Zigbee2MQTT app, select Stop.
- Zigbee2MQTT uses the MQTT discovery feature to make the Zigbee devices available in Home Assistant. After removing the Zigbee2MQTT app, the devices are still present in Home Assistant since the MQTT broker is still holding on to the MQTT discovery messages.
- It is recommended to remove these stale devices from the MQTT broker (see next steps).
Step 4
Removing Zigbee2MQTT devices (option 1)
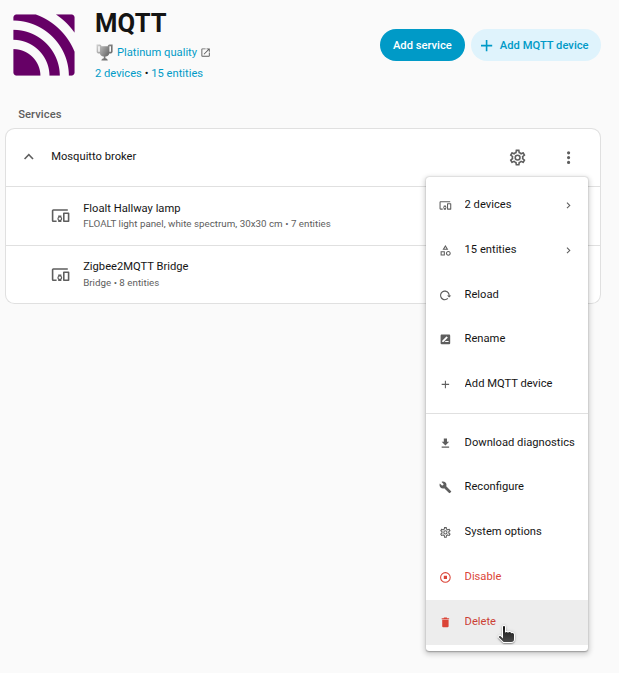
If you don't use MQTT outside of Zigbee2MQTT, you can delete the MQTT integration.
- Under Settings > Devices & services, select the MQTT integration.
- Select the three dots and in the dropdown menu, select Delete.
Step 5
Removing Zigbee2MQTT devices (option 2)
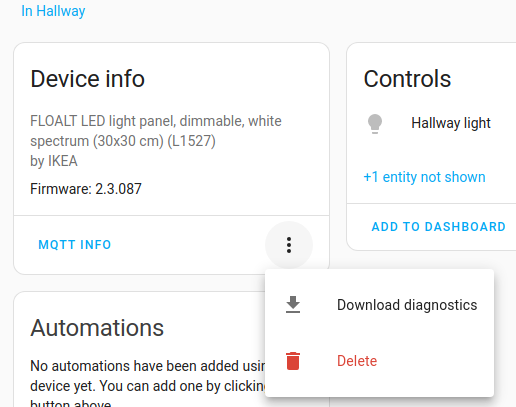
If you don't want to delete the complete MQTT integration, you can remove individual devices from the MQTT integration.
- In the integration card, select Devices, under Device info, select Delete.
- Repeat this for every Zigbee device.
Step 6
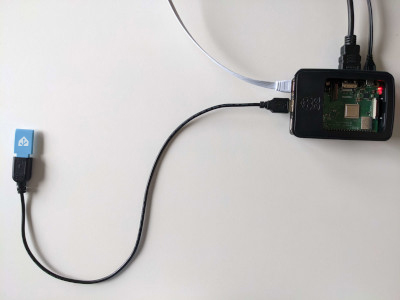
Plugging the extension cable into Home Assistant Connect ZBT-1
Notice
USB 3.0 ports and USB 3.0 drives can cause interference with 2.4 GHz protocols, including the ones provided by Home Assistant Connect ZBT-1.
- It is important to use the USB extension cable and to position the Home Assistant Connect ZBT-1 away from possible interference sources.
- This video shows the effect of interference.
- Plug the Home Assistant Connect ZBT-1 into the USB extension cable.
- Plug the extension cable into your Home Assistant instance.
- If you are using the standalone Home Assistant Container installation method, make sure Connect ZBT-1 is mapped to the container.
Step 7
Adding the adapter's integration
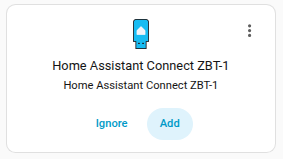
- Go to Settings > Devices & services.
- The Home Assistant Connect ZBT-1 integration should now have been discovered.
- Select Add.
Step 8
Picking your protocol
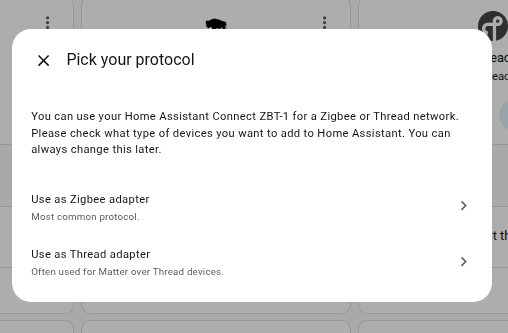
- In the dialog, select Use as Zigbee adapter.
Step 9
Select installation type
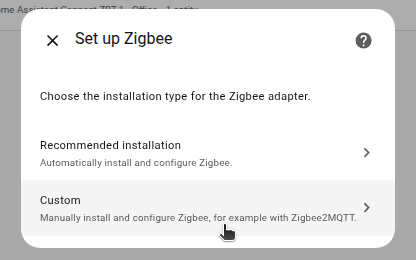
- In the dialog, select Custom.
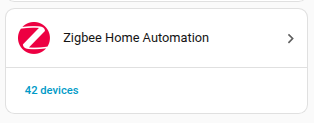
- When asked to select the Zigbee method, select Zigbee Home Automation.
- Then, select Submit.
Step 10
Uploading a manual backup
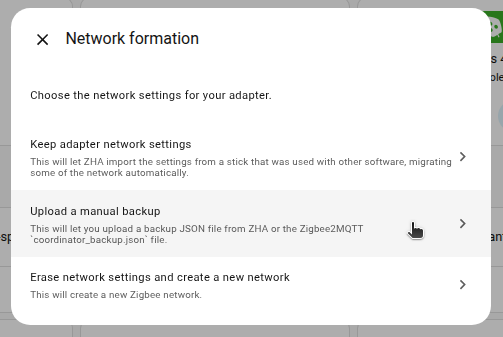
- In the Network Formation dialog, select Upload a manual backup.
Step 11
Select the backup file
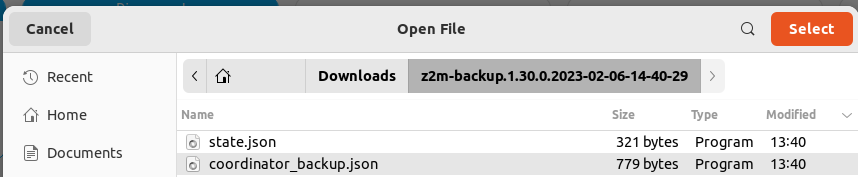
- In your Downloads folder, select the coordinator_backup.json file.
Step 12
Submit the backup json file
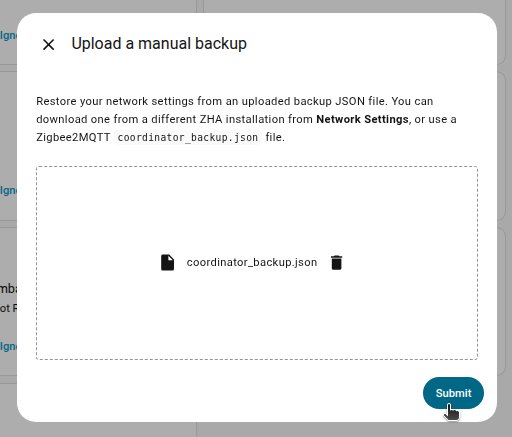
- Make sure the coordinator_backup.json file is selected and select Submit.
Step 13
Assigning coordinator to area
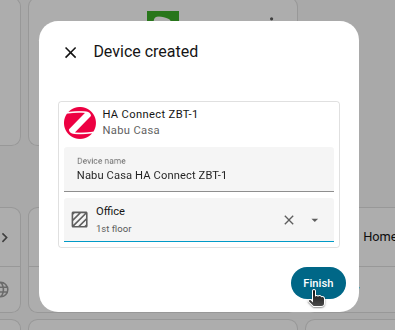
- Assign the coordinator to an area and select Finish.
- Info: You won't be able to control the devices until they rejoin the network. Normally, they join within one hour. You may be able to accelerate that process by power-cycling the devices.
Step 14
Reconfiguring automations and dashboards
- Info: All migrated devices have new entity IDs. This means you will need to manually reconfigure automations and dashboard cards.
- Info: The names that you manually assigned to your devices won't have been migrated. You will have to rename the devices again.